Monday, September 9, 2013

Honda Element Camper/Platform

After sleeping in the back of the Honda Element a few times, I realized that, 1. it's actually comfortable, and 2. it can be even more comfortable with a few modifications. My obsessive little brain got to work, and with the help of the internet, (and the Honda Element user forums), I was able to discover just how easy it would be to add a sleeping platform.

My only requirement was that I could make it without buying any more tools (I own a tool box, a drill and a cheap hand saw). I found a plan that required only drilling, and added only a few modifications of my own.

Logic:

1. I wanted to use PVC pipes as the legs, because then I could make them different heights, if I changed my mind in the process of building. Also, a PVC pipe cutter is only $15, and the end attachment that goes into the PVC pipe was the easiest way to attach the legs to the plywood

2. I wanted to be able to rearrange the platforms to be able to use latitudinally or longitudinally, depending on the adventure. The idea was that if we needed to add another seat, than the platforms should go in longitudinally. Additionally, if they could be stacked in that position, then we could also fit our bikes in while traveling

3. The platforms had to be easy to get in and out

4. With no carpentry skills whatsoever, I had to be able to do this without anyone else's help.

5. I actually wanted the center support to be removable, in case we found we didn't need it (turns out we don't need it right now)

After some careful measuring inside the Element, and consulting the plan linked above, I headed off to Home Depot.

Materials:


(2) 2'x4' 3/4" thick plywood
(10) 2" diameter PVC caps that fit on the end of the 2" pipe- this was the hardest part to find
(1) 10' length of PVC (actually ABS) pipe, 2" in diameter
(26) 1-1/4" bolts, with accompanying nuts and washers. I ended up choosing carriage bolts, after careful consultation with my helper at Home Depot.
(4) turnbuckles (I didn't know what those were until I went to Home Depot)
(4) loops that screw into the board, to attach to the turnbuckles
(1) PVC pipe cutter
(1) piece of 4x8' carpet (with a little room to spare)
(1) tub of carpet glue and spackle

Here are most of my materials:


After measuring the inside of the Element multiple times, I began construction.


The PVC pipe cutting was a lot easier than I thought. The whole process only took about a half a day, and that's from someone who has no carpentry skills and no craft skills.

Before long, I was putting in both platforms to make sure they fit!


From the underside, you can see the legs:

With a little more careful measuring, I probably could've gotten the legs closer to the side panels, but the dimensions were really awkward, and I wanted to make sure they fit. Finally, Cody got in to help demonstrate:

Once that was done, I added the carpet:


I could not believe how well the final product turned out. The turnbuckles secure the platforms in place so they will not move while driving, or stopping short. The platforms also turn the other direction, so that a seat can be placed in while a platform is in next to the seat (no picture yet). Finally, I made an additional support beam that can go under the center section of the two platforms to provide additional support. However, with our camping gear, we've found the support is perfect without the additional platform, so now we leave that piece at home.

And here is the final product, in use!

We can fit almost all of our gear underneath, and the boxes slide out to give us access to our food and supplies. The boxes are 11" in height, and just make it underneath, without the lids. We use a queen size air mattress to sleep on. If we needed more headroom, we could get a foam mattress (the air mattress is nearly 7" high, when filled). We can still sit up on the bed, though, so it's been fine so far.

The platform reaches to the end of where the seats fold down, so the end of the air mattress is supported:
As you can see, we still use the dashboard for storage.
Additionally, when the platforms are in, there is still plenty of room behind the seats so that a cooler can fit.


The Element's back hatch works as a table while camping:

This gives us the perfect car camping set up, without having to unload too much of the car every time we want to sleep. That big gray thing in the picture is my stand up paddle board- even that fits underneath the platforms!

Cody loves it, too!


And here's how much head room we have:

Luckily we aren't too tall!

Sunday, September 8, 2013

Trip Report: Mt. Elbert


Date: September 8th, 2013

We had done Columbia the previous day, so after some debate, we decided we'd do an easier route, Mt. Elbert, on Sunday. It seemed appropriate, too, since this would be Cody's 14th 14er, and Mt. Elbert is the tallest peak, at 14,433 feet. Waking up in the Element was terrific, as always:

Despite camping .25 mile from the trailhead, we took our time and slept in. We got on the trail at 9:00am. Ryan was training for the Bear 100 trail race, so he decided to see if he could run the whole mountain (he did!). Cody and I took our time, enjoying the trail.
Elbert went that-a-way
The Colorado trail, leading to Mt. Elbert
It seemed like in no time at all, we were breaking tree line, and began the steady slog to the top. There were a lot of people on the trail, since it was such a perfect day. Cody got tons of compliments, pets and a lot of food. She loved every other hiker on the trail that day, even stopping to sit with them for a bit. What a goof!
This exact spot is tree line

See- no more trees here!
Finally, we saw Ryan running down the trail. Cody saw him too, and took off after him. And yes, I am an awful wife, because I laugh when Ryan almost falls ;)

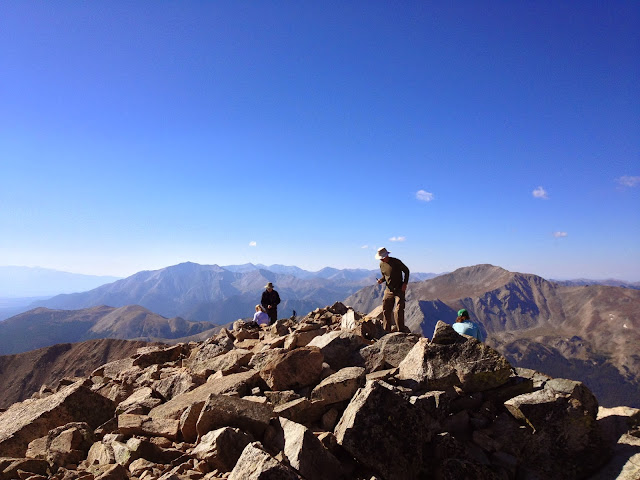
It took us a little bit longer to ascend after that, and the views, like always, were amazing. It was practically a party at the summit, but I didn't mind. Cody was on her best behavior, and only went begging for treats from the folks who had teriyaki beef jerky. She gets attention from nearly every hiker out there, especially when she's wearing her boots!
Dog in boots!

The Summit Shot

Tongue out to celebrate her 14th 14er!
See, there IS water in Colorado!
On top of the world


I don't have a data summary for this hike because my garmin battery died!! The horror! However, this trail is extremely runnable (despite the lack of oxygen). There's almost no technical footing, and the ascent is relatively steady the whole way up. On a weekend, you'll have a harder time dodging people than rocks, though, so be prepared for the crowds.

Saturday, September 7, 2013

Trip Report: Mt. Columbia

 Date: September 7th, 2013

We intended to do Columbia + Harvard. After learning our lessons on previous trips (doubting ourselves on Mt. Massive, and not finding a connecting trail to Missouri), I bought a new book to help find more routes.

With the new Element Camper in place, driving up to the trailhead after work was a breeze. We just pulled into the trailhead parking lot (where I unfortunately backed into a giant rock- no damage), inflated the air mattress and went to sleep. We got an early start! On the trail at 6:54am. It was actually dark when we started! However, we didn't use headlamps, since the sunrise was basically right away.
Gorgeous Colorado meadows, before breaking tree line
Another obligatory shot of the early morning sun:

This trail wasn't quite as pretty as some of the others, but it still had plenty of steep vert and fun switchbacks!

As we broke treeline, we had to climb up some gnarly talus. We took the WRONG route, and basically tried to climb straight up this terrible loose rock that gave way with every step. It was like snow, except not soft and forgiving. There was no obvious trail, and there were people ahead of us, climbing up the gnarly rocks. This was our first experience being on a non well marked route, that also isn't very popular. Our route finding skills are terrible, and only got worse throughout the day.
This was taken on the way down- but you get the idea- lots of really loose rock
Slogging to the top
The summit was gorgeous, as always!


After finally summiting Columbia, we could see Harvard in the distance. After consulting our guide book, and trying to understand the directions and trails, we descended the other side of the summit, and boulder hopped for a long time. It was really, really slow, and very difficult to not fall down. Cody did awesome through this whole section- she is so good at bouldering!
Is that Harvard? Who knows?!
Despite having my new guide book and reading over the route multiple times and bringing a picture of the route description with us, we still couldn't find the trail that connects Columbia to Harvard. Because of this, we had to re-ascend Columbia, then descend down the awful rock slide, and it felt like we were doing far too much damage to the mountain. Since we had so much difficulty, Columbia was our least favorite route. If we had done things right, I still don't know if we would've liked it quite as much. Harvard still looks like a nice hike, though

Crazy descent!

Overview:

The climbing doesn't really start until 4 miles, so you can get some decent running in before then. After that, it's slow going. This was our slowest route, by far
Total Distance: 11.94 miles
Total Time: 6:00:00
Moving time: 4:13:28 (21:14min/mile)
Starting elevation: 9,916 feet
Max Elevation: 14,022
Total elevation gain: 4,529
Elevation profile:


Monday, September 2, 2013

Trip Report: Mt. Yale


Date: September 2nd, 2013
Trailhead: Denny Creek trailhead, 12 miles up route 306 from Buena Vista (Cottonwood pass)

The previous day, we had run/hiked Mt. Belford and Mt.Oxford. After eating a wonderful meal at Eddyline restaurant in Buena Vista, we planned the next days ascent. We decided that Mt. Yale would be perfect, and parked our car near the trailhead and slept in the Element.

The storm clears, over the mountains

After a comfy night's sleep, with minimal outside animal noises, we got another sort of late start (8:30am). The first part of the trail was so beautiful- through what almost looked like a bamboo forest. The trail wasn't too technical, so if we hadn't been so sore from the previous days hike, it would've been very runnable.
The trail looked like this for the first 2-3 miles

Like most other 14er trails, it was a steady climb from the first step, but the pitch really started to increase right around 3 miles. As we broke through the forest, the morning light was again spectacular.
Cody in the morning light. I have no idea why she's grimacing

I can see for miles and miles and miles and miles

After a lot of switch backs, and a non-technical trail, we hit the rocky section, which required a bit more sure footing. After a relatively small section of rock scrambling, we reached the summit.
Above treeline

The trail gets a touch technical, but nothing too terrible

We were rewarded with another day full of amazing views.
More perfect weather! Also- Cody's wearing her bear bell!

Smiley happy people

Those are probably other mountains that we've climbed :)

I swear she enjoys the view as much as we do

Aw, mom and her dogter. Also, notice the difference in clothing choices between Ryan and I- he gets cold on the mountain, I get hot

Cody's 12th summit!

Overview: The route we took was pretty steep, right from the beginning. Technically speaking, there was a mix of rocky terrain, and very runnable terrain. We were able to run almost the entire way back.
Nice, smooth trail

Happy Trail runners

After our adventure on the trails, we went to nearby Cottonwood lake and hung out on my paddle board for the rest of the afternoon
Reading my Kindle while relaxing on the SUP. Cody, Ryan and I were all on my board
Cottonwood Lake

Cody relaxes on the Paddleboard with her mom and dad

One tired AdventureDog!

Details:

Distance: 9.66 miles
Total Time: 4:14
Moving Time: 3:04 (19:05 min/mile)
Starting Elevation: 9.951 feet
Max Elevation: 14,159 feet
Total Climb: 4,220 feet
Elevation Profile:


Even with the tricky footing, Ryan descends like a champ: