Showing posts with label Gear Review. Show all posts

Sunday, April 20, 2014

Adidas Adios Boost Shoe Review

Ryan's Review
I like lightweight shoes. I have toothpicks for ankles and a frame sometimes described as bird-like, so I appreciate shoes that cut the weight at the end of my slim leg pendulum. I also like shoes in the 8-10mm drop range, but unfortunately for me, most lightweight trail shoes gravitate toward the 4mm drop end. These make my calves explode.

So I tried an experiment with road shoes: Adidas Adizero Adios 2.0. These shoes are 8oz, 10mm drop, with a tough Continental rubber outsole. I loved them. I was running rugged mountain trails in the Golden, CO area and not feeling rock poke. My calves were singing praises. My only issue was the upper. I couldn't lock down my heel without tying the laces really tight, hurting my instep.
Adidas Adios 2.0
Enter the Adidas Adios Boost. Same specs (drop, weight, outsole) as the 2.0, but with two major improvements. First, the midsole: Boost technology does not use EVA foam; instead, it is made of thermoplastic beads that are fused together. This midsole is among the bounciest and most durable I have ever run on. It's like Hoka bounce without the stack height or extra give. Second, the upper has a stiffer lacing system that allows for heel lockdown that is so good I don't even run in my Adios 2.0 any more. It can't compare. 
Adidas Adios Boost. White Ranch Park, Colorado
This is a lightweight road shoe that you can use for running mountain trails. My first run in the Adios Boost was a 23 miler at White Ranch, featuring loads of steep, rocky terrain, cambered, snowy trail, and 4,000+ feet of vert gain. This shoe is up for the task. The next weekend I ran a 25 miler at White Ranch, again. I could bomb down the loose rock with confidence that the outsole and midsole would protect me, despite the fact that this road shoe has no rock plate. They're super snappy on the uphills and I've had some of my fastest mountain training runs in them.

Ride and Fit

The ride is firm on the Adios Boost, and it feels like an 8mm drop, but the claim is 10mm. Two drawbacks for trail running is they're not good in loose, dry rock/sand, and they're ice skates in mudCompared to the Adios 2.0, they run slightly larger than size (maybe try 1/2 size down). The toe box is standard, and the heel is narrow. The low heel collar lets in a lot of debris, so you might want to use gaiters on dirty trail.

Pedigree

Hal Koerner won Hardrock 100 in Adios 2.0. Chris Vargo won Golden Gate Dirty 30 in Adios 2.0. Patrick Makau set a world record marathon 2:03:38 in Berlin in 2011 in Adios 2.0. Now with the Boost midsole technology -- both springy and durable -- if a touch heavier than EVA foam, this is a superb shoe.
Adios Boost sticking to rock on Beaver Brook Trail

Alaina's Review

Ever since I tried on the Adidas Boost shoes while working at Runners Roost, I couldn't wait to own a pair. The original Boost shoes are super comfy, but they are a lot bulkier than the majority of shoes I run in. When Adidas added the Boost technology to their lightweight Adios, I was sold. 

My first run in them was a 12 mile run on the Colorado trail. When I first put them on I was worried that they wouldn't have enough cushion to protect me from feeling every rock on the trail. I was quickly proven wrong. For how little cushioning there is, I was amazed at how much they protected my feet. I could still feel the ground really well, just not the jabbing rocks that I can sometimes feel in my Salomon Sense Ultra and La Sportiva Vertical K. They were very quick and responsive. I just love how the Boost technology feels.


Pros

Soft, yet springy and responsive
Good ground contact feeling, yet protective on all terrain
They just feel fast

Cons The only cons I have for these shoes are based on how they perform on trails, and obviously they were designed as a road shoe.

Very slippery on light, loose dirt/sand
Not great traction on ice/snow

Ultimate Direction Jenny Ultra Vest Review

I am in love with a hydration pack. I didn't think it was possible- but then the UD Jenny pack came into my life and my shoulders, diaphragm and back are all happy again after every long run. I have been running with the Nathan HPL for the last 2 years. The Nathan pack fits well and doesn't bounce or slosh, but I could never get it to feel secure across my chest without pinching my breath or irritating the crap out of my shoulders/trapezius muscles. I dealt with it though, because the only other options with more than one front buckle were Salomon packs that were out of my price range.

This season, both Nathan and Ultimate Direction have stepped up their game and have introduced quite a few nice packs. At first, I really wanted the Nathan Vapor Shape due to it's amazing storage capacity. However, when trying it on at the store, even the smallest women's size cinched down as much as it would go still left way too much space and would not fit snugly. The sizing chart online even says 31-36 compared to UD XS/S which is 26-38.  I then tried on UD's Jenny pack and it instantly felt right- like a nice hug.

Why I'm in love:
1. The most critical reason for needing a new pack was that I needed to have 2 buckles in front. I realized that the main issue I had with the Nathan pack was that it only had 1 buckle up front and in order for me to make it feel snug and not bounce around, it ended up putting too much pressure on my chest/diaphragm and made it hard to breath. The Jenny pack solves this with 2 buckles, and they are both moveable so I can get them in the optimal position to not restrict my breathing.

2. It comes in 2 sizes, so the XS/S actually fist a small/skinny runner without it having to be cinched as tight as it can go, so I have options to make it tighter or bigger. Measuring my chest around my diaphragm/rib cage is 26.5" and around my "boobs" (ha) is 30". The XS/S fits very well and would fit someone even smaller if need be.

3. The bottle holders on the front counter balance the weight so that the entire pack is evenly distributed across my shoulders, and I never feel like my trapezius muscles are going to explode. With a hydration pack that only has a bladder in back, it seems to put too much pressure on my shoulders/traps and I am always sore by the end of a run. This also adversely affects my breathing. I was nervous at first about water bottles on my chest but I haven't even noticed them. Well- that's not true- I do see them, which reminds me to drink and I've been better hydrated this past month then I have been in a while!
The two bottles up front don't hurt and they remind me to drink!

4. It's pretty :) I don't like overly girl things, so the purple strikes a nice balance of feminine yet non-girly.

5. The flexibility of storage is amazing. There are 4 pockets in front- 2 for water bottles (but they can also hold Gu or a knife if you're scared of mountain lions like I am), a zipper pocket for my phone (fits the iPhone 5s with a case on it), and another velcro pocket that can fit at least 3 Gu's and my chapstick. In the back, there are 2 main pockets. One pocket has bungee cords that can secure a bladder. The other pocket has been perfect for stashing my jacket and gloves, as well as additional food. The amount of stuff I've fit in this pack is amazing, considering how lightweight it is when empty. It also has a key pocket and extra bungees on the outside of the pack in case you want to strap more gear to your back.

6. I love how high up on my back it sits. It almost sits between my shoulder blades it's so high! This again takes the pressure off of my shoulders and makes it easier to breath overall.
It sits in a perfect location on my back. And it matches my shirt AND shoes!

I have now run with this pack for 3 weeks and have no complaints. I even used it while riding my bike! (Well, we rode 12 miles to then go run 12 miles of the Colorado trail)

I have used a bladder in the additional storage pocket on multiple occasions and have been very happy with how it felt. On each of those runs I also counter balanced the bladder by having an additional bottle up front and that seems to help a lot. The only thing to know about using a bladder is that it loads from the side, so there is no easy access to the top of the bladder. The only time I think this would be an issue would be during a race, but it is something to consider.

Right now this is my favorite piece of gear!


Wednesday, November 13, 2013

Gear Review: Hot Dog- the RuffWear Swamp Cooler vest

For the short video version, click play!


Now for the long, detailed version:
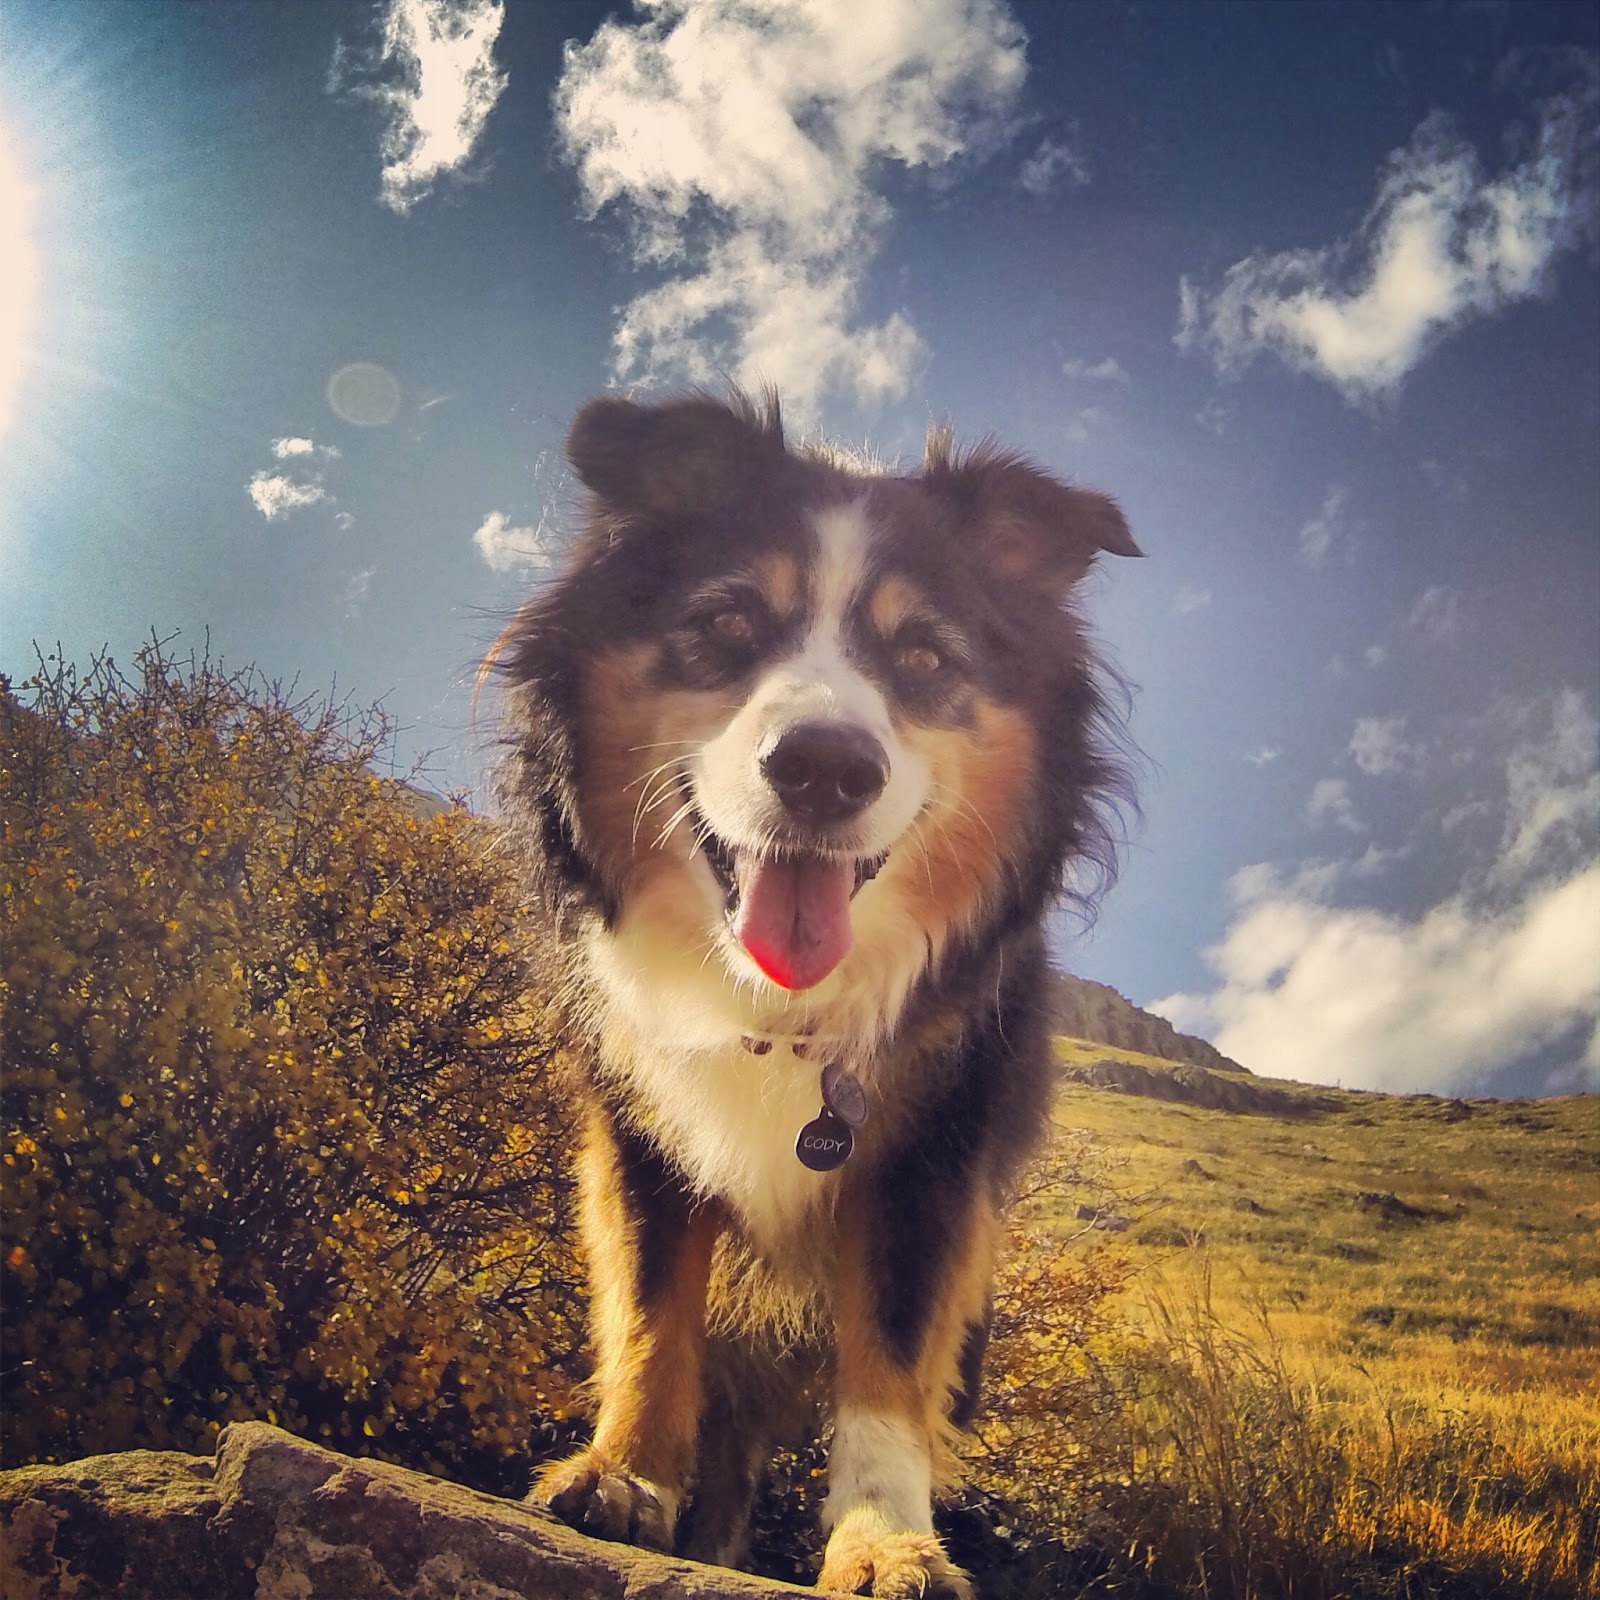
Cody, in case you didn't know, is a 6 year old Tri-Colored Australian Shepherd. Her primary color is black. This is her preferred running environment:
Cody is at home in the clouds and snow- too bad her humans like the sun and warmth!

She grew up in Michigan, where we had approximately 10 sunny days a year. In May, we moved to Colorado, where in the last 6 months, we've seen the sun more than our entire 6 years in Michigan.

Colorado does have very warm summers, but in general, the temperature is mild. I am very careful to monitor the temperature when deciding whether or not to take Cody on my run. In Michigan, if the temperature was below 70, she was good to go. I applied a similar principle here, but found Cody struggling in temps as low as 50. There was a particular hike we did on Mt. Elbert, where the temperature was probably in the 50s, but she was hiding under any shady rock she could find. I was so concerned that I took her to the vet and shelled out $200 to get her blood checked. She was fine, of course- she had just run over 30 miles the previous week!

A few weeks later, I was petting her on another cool run, and realized her black fur was BLAZING hot- even though the outside temperature was in the 50s. It suddenly hit me- the outside temperature wasn't slowing her down- it's was the hot sun on her black fur! Add to that the fact that we now live at 5,600 feet- so the sun's UV rays are even more potent- and we frequently hike up to 14,000 feet. Poor Cody!

I immediately began researching the available products to protect Cody from the sun, and the first place I checked was with one of my favorite brands, Ruffwear. Of course they had a product for hot dogs- the Ruffwear Swamp Cooler vest! After carefully considering the technology they used and online reviews, I sent Ryan off to REI to purchase a $55 dog coat (there was a lot of eye rolling involved, from both Cody and Ryan).

When I first held the vest, I was a little unsure of my purchase- it felt like a sweater, it was so thick- and it was also really long, covering Cody from her neck to her butt. Rather than return it, I figured I should at least try it, and we had the perfect opportunity on our trip to Moab, UT. What better place than the desert to see how it works!

Our first run was in a canyon, which was cool and shady- no vest. We ran 8 miles, which is usually good enough for Cody. However, later in the day, we decided to check out another trail. As we prepared for the run, Cody was hiding in the shade, acting like she didn't want to go. I got out the SwampCooler vest, and put it on her. The instructions for the vest are to pour water on it. Usually when I put water on Cody's back, she gets mad (even though she swims every chance she gets). With the coat on, she just stood there. Almost immediately, she was reenergized, and took off running into the sun. I really didn't think it would have such an instantaneous effect, but it did- she had so much energy!
What a perfect little dog model!
The original qualms I had about the thickness were instantly resolved- the material was absorbing the water and holding it in. The length covered almost the entirety of Cody's back, protecting nearly all of her black fur from the sun. We had a wonderful 4 mile run on slick rock in the hot sun and Cody was amazing.

The next day, we ran even longer, this time in the mid-day desert sun. Cody made it 12 miles, with no shade, in temperatures that probably reached 70 degrees. Obviously, this wasn't the warmest of days- but considering how much she has struggled on a sunny 50 degree day, it was a huge improvement. I only had to reapply water 2 more times, and the SwampCooler vest stayed wet for nearly 2.5 hours. I also periodically felt her fur underneath the vest, and it was always cool to the touch, without feeling wet.
Best way to run in the desert- no clothes on the human, SwampCooler vest on the dog

Hot sun, not a hot dog!
Since then, I've had her wear the vest a few more times, mostly on sunny days in the 60's, and it has continued to work amazingly well. It doesn't hinder her movements while running, and doesn't slip off, even after swimming in ponds and rivers.

Perfect coverage of her back. Size Medium 
The SwampCooler vest stays in place on all of our runs
The vest works in both of the ways it advertises. The material reflects the UV rays, so it literally acts as a shield against the sun. From Ruffwear's website, they say that the three-layer construction uses an outer layer to facilitate evaporation, while the middle layer stores water, and the inner layer transfers the cooling power of evaporation to keep the dog cool. Perspiration off of our own, human skin keeps us cool. Dogs don't have that ability- they don't sweat. Cody has more protection against the sun than most breeds, due to her dual layer coat that traps cooler molecules closer to her skin. But the blazing sun against her black fur gets hot. The Swamp Cooler vest utilizes the same principle that keeps us humans cool, and has been harnessed for use by desert dwellers since the Ancient Egyptians. As liquid evaporates, it sheds molecules into the air. As those molecules become suspended in the air, they actually take away the heat from the surrounding air, cooling it down as the molecules find a balance between water and air. There is an added bonus that the remaining liquid also cools down, since the hotter water molecules are able to make their escape into the air (explanation adapted from HowStuffWorks.com).

Here are a few more pictures of the underside of the vest (I couldn't find too many prior to ordering it, so maybe these will help)
Swamp Cooler, upside down
The buckle is tucked into the material so it won't cause any irritation
This is the underside of the vest
The only caveat is that we live in a dry climate. I have not had the chance to test the vest in a humid environment. My feeling is that it would still be quite effective as a UV shield, and that the inner and middle layer would still be able to utilize the stored water to keep the dog cool, but just like running in a humid environment, perspiration only gets you so far- humidity is still tough!

Overall, I rank this a 10/10. The construction, design and utility are all impeccable. The only thing that I might change is to sew on a handle, so I can still use it as a harness when we're out for a run.


Thursday, November 7, 2013

Gear Review: Salomon Fellcross 1 Shoe Review


The Salomon Fellcross is inspired by fell running, which is popular in the UK. Essentially, fell running is where you are tasked to run from point A to point B and figure out your own best route there, rather than following a marked trail to the finish. As a fell runner, you will likely run through mud, bogs, and other soggy conditions on your way up and over hills.
Fellcross in their element
The Salomon Fellcross outsole has long, aggressive, multi-directional lugs -- aimed toward your heel in the forefoot and toward your toes in the heel -- that are spaced far apart in order to bite into soft ground and shuck the mucky hanging-on debris. This design is great for runners in wet, squishy, muddy conditions, as well as snow running. The Fellcross are terrific fall, winter, and spring trail shoes when the conditions get messy on the trails. The lugs will grip well in deep, powdery snow and wet, heavy snow better than yak trax or microspikes, which will move around and sometimes come up around the outsole of a shoe while running. If I'm in these conditions, I'll never choose yaktrax or microspikes over Fellcross. However, in frozen conditions, the Fellcross performs terribly. The outsole is made of material that will slip and slide over icy, hard packed snow as well as wet, slick rock. But in 3-4+ inches of snow, they will eat up the conditions marvellously. Also, The outsole wears slowly, so the high cost ($180ish) won't bite you by season's end.
Multi-direction Lugs
Big Lugs
Fellcross are less flexible than the Speedcross and the Hornets, especially in the midfoot. At 4mm drop, they will tax the calves up steep slopes, and without rocker technology, I've found my feet to slap the ground in the forefoot, even when concentrating on my stride. They do not feel light weight, but in the wet, cold, muddy, snowy conditions they are built for -- where you're covered from eyes to toes in heavy cold gear -- weight isn't that much of an issue. 
Lots of traction in the snow
Because of the shape of the inside of the shoe, the medial of my big toes have been chafed and calloused by running in these for longer than 2 hours, and I have a narrow forefoot, so this came as a surprise. 

As for the upper, I like the quicklaces (with garage area for tucking in the excess lace), but the quicklace requires some adjusting to get used to. Often my instep is bruised from over-tightening the laces in order to keep the shoe in place through mud. One huge plus is that the upper is solidly made. I've run in Peregrines in the mud, and the torque between the outsole and upper tears the fabric on the upper of the Peregrine, especially in the inner forefoot, but even after 200+ miles in the Fellcross, that area remains unharmed.

For 14er hiking/running, I often choose these shoes when there is going to be snow or mud, and they never disappoint. They are very warm, which is great when paired with some Smartwool socks, but in the late spring my feet cook in the Fellcross as they don't breathe well. I love the lugs right up front in the toes, especially when ascending 20%+ grade mountains. I feel like I can dig the toes in like crampons.  
Perfect Fellcross conditions

You can't see it- but even Cody and the photographer are wearing Salomon's ;)

In sum, the Fellcross are best in muddy or deep snowy conditions, and worst in icy or hard packed trail or road conditions. They fit true to size (I'm a 10 in most shoes, including Salomon, and true to Fellcross). I'm looking forward to trying the Fellcross 2 which use the Salomon Sense and Ultra endofit technology for better fit, but overall I'm happy with the Fellcross 1 for what they excel at.

Thursday, October 31, 2013

GoPro Hero3 Black

We got a new toy!! We've been having so much fun taking videos with the iPhone while running, we decided to get fancy and bought a new GoPro Hero3 Black. (If you just want to watch the CodyCam in action, click here.)
I love the ritual of opening a new toy

It's so small! Yet so rugged- I think it can handle us!

Itty bitty GoPro

It arrived on Tuesday and I immediately set to work attaching it to Cody (of course)
GoPro DogCam!
I decided to use her running harness from Julius K9I'm still exploring the different options of how best to have the GoPro on Cody while running. This set up wasn't too bad, and I just used various velcro straps and arm bands we had lying around the house, as well as a FILM canister for added support (the clear plastic thingy)
Temporary CodyCam mounting system.

Yesterday, Cody and I went for a run to test out the new CodyCam, and took some shots of our local running trail, North Table Mountain.
North Table mountain, looking towards Boulder

Fish eye, meet stink eye
New toy?!
The CodyCam!

I'm still learning all of the settings and how to post-process the videos. The learning curve is definitely steeper than an iPhone ;) I will post a much more detailed review of what I've learned, and my opinion after actually using it for more than a day. In the mean time, enjoy these quick videos I put together using the new GoPro! I apologize if the quality is low- I am still figuring out all of the export settings, and how to NOT compress the video quality as much. The camera actually takes stunning videos, but the consequence is monster file sizes!

(Mobile won't work because of the song I chose)


Mobile here

Monday, October 28, 2013

Gear Review: Brooks LSD Jacket

An essential article of clothing for every trail runner

Our awesome jackets. And the awesome mountains. The wind was gusting at 30-40mph in this picture- check out my arm!
Within a month of moving to Colorado, I experienced first hand the craziness of mountain weather. In July, I left my house when it was sunny and 70, and by the time I was halfway up North Table Mountain, a storm blasted in, dropping the temps 30 degrees and pelting me with hail. Although the storm was brief, it reminded me that layering is critical out here, as well as leaving the house prepared. Since I didn't own a good lightweight jacket at the time, I started looking around. I remembered that a friend of mine in Michigan used to wear her Brooks LSD jacket on the coldest of our frigid early morning runs, so when I found out the jacket also weighs in at 4.3 ounces (size medium), and packs into its own pocket, I knew this was the one for me.
Jon loves his Brooks LSD jacket as well at 14,000+ feet
The old adage "there is no such thing as bad weather, just poor clothing choices" comes to mind whenever I'm getting ready to head out for a run. The Brooks LSD jacket's lightweight portability gives you something most jackets don't have -- the ability to take it off and stow it away, or to bring it for a run, just in case. With proper layering (something like UnderArmor cold gear), this would even make a great winter jacket, cutting down on the windchill effect while not causing you to overheat. I've worn this jacket in 40mph wind gusts, and wind chill temps in the low 20s, with only a light long sleeve running shirt underneath.

After living here and wearing this jacket for 3 months, I can say that this is the most useful article of clothing I own. Whenever I head out for a run with a storm brewing on the front range, I shove this little jacket into my waist belt, and if the temperature drops or it starts raining I can get it out and put it on without breaking stride.
It packs down so small! In it's own little pocket, too!
My little jacket-pouch inside my Salomon waist belt
On every 14er we've climbed this summer, this was the crucial piece of warm clothing on which I've relied. I often wear a sleeveless tank with shorts or capris, and then when we break treeline I put on my Brooks LSD jacket and stay warm on the summit, even on the windiest days.
I have an additional shirt around my waist, since my jacket is so warm. I'm only wearing a tank top underneath, and it was probably 35 degrees on the summit
This was the coldest hike we've done. Ryan is wearing sweatpants over his running tights. He didn't yet own his jacket, or else he'd be wearing it
Before purchasing this jacket, it's helpful to know that there are no side pockets. The only pocket is the one the jacket packs into. I believe the logic behind this is that if there was more material for pockets, it would no longer be lightweight. Personally, I don't use side pockets while running. I have other ways of carrying my phone, gels, and water that don't jostle as much as they would in a pocket. For my use, the pack-ability and lightweight qualities far outweigh the utility of additional pockets.

The Brooks LSD Jacket is considered water-resistant. I've only worn it in the pouring rain once (when Colorado was flooding) so maybe that weather was a bit extreme, but it only kept water out for about 5 minutes. Despite owning the jacket for over 3 months, I haven't had the opportunity to test it in a light rain. I did not get it to function as a rain jacket, though, because it is almost impossible to have a breathable, yet water proof jacket, since those two qualities are opposites. I choose breathe-ability.

I have also found that due to its superior abilities at stopping the wind, it is quite warm- especially compared to how lightweight the material is. For me, since I heat up really quickly, I don't put it on until the temperature drops below 40, or the wind picks up a lot, because it is just that warm! Ryan can wear it in temps up to 50 degrees, but he is always colder than I am when running in the cold. For reference, when we hiked Bierstadt- everyone else (aside from Ryan and Jon) had on pants and winter jackets, while I was running around in tiny shorts, a tank top, and this jacket.

Everyone else on the mountain thought I was nuts….I was warm!

Hood: The jacket also has a really nice hood that adjusts in the back, so you don't have any strings in your face. The only negative about the entire jacket is that the hood doesn't have a pocket or any way to tuck it away when not in use. Occasionally it will flap around in the wind, but it usually stays in place when just running.
Ryan unwittingly demonstrating the hood of his Brooks Jacket
Sizing: I bought a women's medium (5'6", 110lbs, long legs). I have extremely long arms with a thin frame, and I have only a few running clothes that have sleeves long enough to cover my wrists. The medium actually fits quite well, and is only a little bit baggy, but since the jacket has a waist-cinch, I can adjust it to fit nearly perfectly. On the windiest days, it will occasionally balloon (see the first picture), but I would much rather have it fit over my long sleeve running shirts, and cover my entire torso down to my butt. Until I can find a tailor to make clothes for my freakish body, I've learned how to deal with funky fits.

Ryan (5'10", 135lbs, long torso)  has a men's medium, due to the fact that his torso starts at his ears and ends at his ankles. Happily, it covers his entire torso, and is only slightly baggy. He may have been able to get a small, but I'm still convinced it would've been too short on him.
This snazzy jacket….
…fits into this tiny pouch
And finally, here is the Brooks LSD jacket in use, on an extremely windy day in Rocky Mountain National Park:


Pros:
- Lightweight
- Packs into its own pocket for easy portability
- Great warmth to weight ratio
- Wind resistant
- Great for layering
- It has a hood for additional protection against the elements

Cons:
- The fit is slightly baggy (but this also means it may fit over more clothing in colder weather)
- The hood should either be removable, or have a way to tuck it in
- Probably wouldn't do to well in heavy rain- it is only water resistant

Overall rating: 9.5/10 (If the hood were stow-able, it would be a 10)

Monday, September 9, 2013

Honda Element Camper/Platform

After sleeping in the back of the Honda Element a few times, I realized that, 1. it's actually comfortable, and 2. it can be even more comfortable with a few modifications. My obsessive little brain got to work, and with the help of the internet, (and the Honda Element user forums), I was able to discover just how easy it would be to add a sleeping platform.

My only requirement was that I could make it without buying any more tools (I own a tool box, a drill and a cheap hand saw). I found a plan that required only drilling, and added only a few modifications of my own.

Logic:

1. I wanted to use PVC pipes as the legs, because then I could make them different heights, if I changed my mind in the process of building. Also, a PVC pipe cutter is only $15, and the end attachment that goes into the PVC pipe was the easiest way to attach the legs to the plywood

2. I wanted to be able to rearrange the platforms to be able to use latitudinally or longitudinally, depending on the adventure. The idea was that if we needed to add another seat, than the platforms should go in longitudinally. Additionally, if they could be stacked in that position, then we could also fit our bikes in while traveling

3. The platforms had to be easy to get in and out

4. With no carpentry skills whatsoever, I had to be able to do this without anyone else's help.

5. I actually wanted the center support to be removable, in case we found we didn't need it (turns out we don't need it right now)

After some careful measuring inside the Element, and consulting the plan linked above, I headed off to Home Depot.

Materials:


(2) 2'x4' 3/4" thick plywood
(10) 2" diameter PVC caps that fit on the end of the 2" pipe- this was the hardest part to find
(1) 10' length of PVC (actually ABS) pipe, 2" in diameter
(26) 1-1/4" bolts, with accompanying nuts and washers. I ended up choosing carriage bolts, after careful consultation with my helper at Home Depot.
(4) turnbuckles (I didn't know what those were until I went to Home Depot)
(4) loops that screw into the board, to attach to the turnbuckles
(1) PVC pipe cutter
(1) piece of 4x8' carpet (with a little room to spare)
(1) tub of carpet glue and spackle

Here are most of my materials:


After measuring the inside of the Element multiple times, I began construction.


The PVC pipe cutting was a lot easier than I thought. The whole process only took about a half a day, and that's from someone who has no carpentry skills and no craft skills.

Before long, I was putting in both platforms to make sure they fit!


From the underside, you can see the legs:

With a little more careful measuring, I probably could've gotten the legs closer to the side panels, but the dimensions were really awkward, and I wanted to make sure they fit. Finally, Cody got in to help demonstrate:

Once that was done, I added the carpet:


I could not believe how well the final product turned out. The turnbuckles secure the platforms in place so they will not move while driving, or stopping short. The platforms also turn the other direction, so that a seat can be placed in while a platform is in next to the seat (no picture yet). Finally, I made an additional support beam that can go under the center section of the two platforms to provide additional support. However, with our camping gear, we've found the support is perfect without the additional platform, so now we leave that piece at home.

And here is the final product, in use!

We can fit almost all of our gear underneath, and the boxes slide out to give us access to our food and supplies. The boxes are 11" in height, and just make it underneath, without the lids. We use a queen size air mattress to sleep on. If we needed more headroom, we could get a foam mattress (the air mattress is nearly 7" high, when filled). We can still sit up on the bed, though, so it's been fine so far.

The platform reaches to the end of where the seats fold down, so the end of the air mattress is supported:
As you can see, we still use the dashboard for storage.
Additionally, when the platforms are in, there is still plenty of room behind the seats so that a cooler can fit.


The Element's back hatch works as a table while camping:

This gives us the perfect car camping set up, without having to unload too much of the car every time we want to sleep. That big gray thing in the picture is my stand up paddle board- even that fits underneath the platforms!

Cody loves it, too!


And here's how much head room we have:

Luckily we aren't too tall!